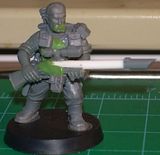
Imperial Guard Veterans are a heavy favorite on the tables at the moment. With BS4 and the ability to pack 3 meltas, who could blame ya for packing a couple squads in Chimeras and letting loose?
But here we've got a slight dilemma, what models should you use to distinguish your vets from the every day body in the meat grinder? What would be a suitable way to make them really stand out? Some players simply buy a different model to use to separate the vets from rank and file troopers, but others such as myself prefer to convert something a little more catchy. Here's a step by step walk through of how I made my latest one.
Tools you'll need
Gue (plastic or super)
Clippers
Saw (the GW hobby saw that is)
Drill
File
Green stuff tool
Green stuff
And the parts I used
Catachan arms
Space Marine Power Pack
Plastic Meltagun
Cadian Torso
- Chaos Space Marine Head
Space Marine Scout Legs
Various accessory bits
Do forgive the poorly lit photos. Lighting in my room is pretty dismal. And the electricity here is fairly sketchy... I keep blowing out my AC and light bulbs on a regular basis.

First off I took the Cadian torso and the CSM head and drilled holes in both of them where the neck should be. This is to set a decent groove for the greenstuff to graft on to.
I also chopped off the exhaust vents on the backpack. That doesn't need to be done at this stage, but it doesn't hurt.

I then fiddled around with the arms to get them set up to hold the meltagun level. Its important to do this before mounting the head so that you can have the figure looking in the same direction as the gun barrel.

I then rolled up some greenstuff and stuck it in the hole I had drilled. Set it in the hole on the torso, smooth things out with your tool and cut away excess. Looking good.

Now for attaching the back pack. You'll want to clip off the little nub on the back of the torso so the pack can align flush with the models back.

Add on some accessories. I like to stick ammo pouches, grenades and knives and such on my models.

A shot of my finished product. Shortsword on the rack, sheathed sword at the hip, ammo pouches along the side of the pack and a canteen on the other side.
Scout lets tend to make the model appear as if its leaning forward. I stuck some green stuff under the right toe of this guy to give him a more upright look.

And there you have it. Sharp looking IG Vets that you can crank out fairly easily. These guys can be a bit costly considering the different sets the bits come from, but if you've been in the hobby long enough you're sure to have enough to spare for a squad or two.




FOTOR.jpg)




.jpg)